Feeds:
Posts
Comments

Archive for September, 2009

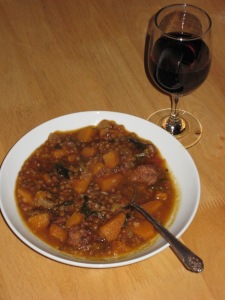
IMG_1717Our butternut vine has found its second wind. I had an idea for a lentil soup with butternut squash in it, and it was so delicious we couldn’t even believe it. I’ve been instructed to use all of our butternuts this way.

VEGETARIAN FRIENDS, of course you can make this without the meats. Just use some olive oil to brown the onions, and then use vegetable broth instead of beef stock. I would not, however, recommend fake bacon. Ever.

Lentil Soup with Butternut Squash, Sausage, and Kale

1 onion, chopped

6 oz bacon, chopped

4 cloves garlic, minced

1 package hot Italian sausage, cut in small pieces

4 celery stalks, chopped

1 large butternut squash, peeled, cleaned, and cut in 1/2- to 1-inch chunks

4 large tomatoes, peeled and chopped

8 cups low sodium beef broth (preferably home made, from the bones of a cow named Bessie)

1 bunch kale, sliced

8 sage leaves, sliced

1 Tbsp ground cumin

2 tsp pepper

salt, to taste

1 Tbsp paprika

hot pepper flakes, to taste

1 tsp fresh rosemary, minced

1 cup dry French green lentils

1/4 cup dry bulgur

  • Place bacon chunks in large heavy bottomed pan on medium heat while you chop up your onion and garlic.
  • Add onion and garlic to pot and cook until bacon has browned and onions start to caramelize, stirring frequently.
  • Add sausage. Either brown the sausage separately ahead of time if you want to drain off the juices, or just add it directly to the pot and cook through, stirring frequently.
  • Add celery at the same time as the sausage, or as soon as you have it chopped. Cook until celery is wilty.
  • Add the butternut chunks, and stir.
  • Add the tomatoes, kale, and then the broth.
  • Add spices, and bring to a boil.
  • When the kale has wilted to make room in the pot for the lentils and bulgur, add them.
  • NOTE: this soup gets better as it sits in the fridge – boy are you in for a treat!
  • **VEGETARIAN FRIENDS, of course you can make this without the meats. Just use some olive oil to brown the onions, and then use vegetable broth instead of beef stock. I would not, however, recommend fake bacon. Ever.

    Read Full Post »

    Yep, that's my new Kitchenaid Mixer in the background! I love her - her name is Lola.

    Yep, that's my new Kitchenaid Mixer in the background! I love her - her name is Lola.

    Well, the time has come. I can no longer deny that peach season is coming to an end. I’m sad about it, but all is not lost – you can make smoothies with those mealy peaches that you can’t bring yourself to snack on because it’s too depressing.

    Aromatic Peach Smoothie

    4 mealy peaches, peeled

    1 cup goat yogurt

    1 Tbsp orange flower water

    1 tsp cardamom

    1/4 tsp vanilla extract

    1/4 tsp almond extract

    milk or water to thin to desired consistency

    • Place first 6 ingredients in blender.
    • Blend.
    • Add enough milk or water to achieve desired consistency.
    • Drink fresh, or refrigerate overnight (it’s better the second day).

    Read Full Post »

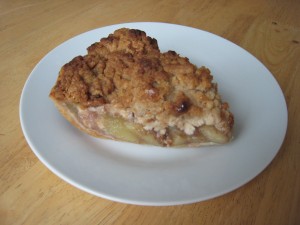
    IMG_1641I’ve been working on perfecting this apple pie since I was maybe 10 or 11 years old when I started baking pies. I like a LOT of fruit and very little added sweetness. I’m not a big fan of pastry crusts, so I usually make some sort of crumble crust, and the ingredients vary depending on the fruit I use. I used to use an oil pastry, but recently decided to switch to butter. This one was pretty good, but I still think it should be flakier, so I may have to update this post later as I play with the pastry. I hate soggy crust, so I always pre-bake my crusts to a nice golden brown.
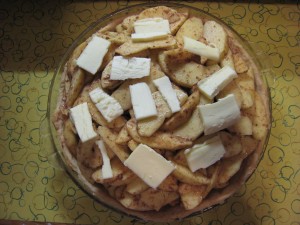
    I have found that the key to a really really delicious pie is the fruit you put into it. The best types of apples to use are either MacIntoshes (available on the West Coast), or Maccoons (available on the East Coast). If either of these are not available, you can use 4 tart and juicy ones like Granny Smiths or Pippins, and 3 Rome Beauties, which are always very mealy, so they absorb the juice from the tart juicy ones. I have found that this is the very best ratio for the most mind blowing apple pie. NEVER, EVER use Fujis. Fujis will fool you because they are so delicious to snack on, but they do NOT soften when you cook them, regardless of how long you cook them. It’s a disaster, so just don’t even try it.

    Good Old Apple Pie

    Pastry

    10-inch glass pie pan

    1.5 cups flour

    3/4 tsp salt

    1/2 cup cold unsalted butter

    3 Tbsp cold water

    • Heat oven to 425.
    • In a medium bowl, mix flour and salt.
    • Cut in butter and mix with a fork or pastry cutter.
    • Add water, 1 Tbsp at a time, mixing between each.
    • Form dough into ball and roll out. (It helps to roll out between two sheets of wax paper.)
    • Place dough in pie pan, with pie weights placed on top. If you don’t have pie weights (I’ve never actually used them, but they seem like a good idea), then you can place a layer of foil on top of the crust, and then either dry beans or rice on top of that.
    • Bake for 12 minutes at 425.

    FillingIMG_1623

    7 cups apples, peeled, cored, and thinly sliced (about 7 apples – either all MacIntosh/Maccoon or 4 Pippin/Granny Smith and 3 Rome Beauty)

    1 Tbsp flour

    1 Tbsp sugar

    1 tsp cinnamon

    1/4 tsp cardamom

    1 Tbsp salted butter (dotted around the top of the filling, after you place it in the crust)

    • Thinly slice apples, and place in large bowl.
    • Sprinkle flour, sugar, and spices over apples, and mix to coat apples.
    • Arrange apples in crust. It will look like you have WAY too many apples, but they will shrink later so don’t worry.
    • Dot butter around the top of your stack of apples.

    Crumble ToppingIMG_1626

    1/2 cup salted butter, cold

    1/2 cup dark brown sugar

    1 cup flour

    • Mix butter and brown sugar with a fork.
    • Add flour, and mix with a fork or pastry cutter. Do NOT overmix. Only mix until everything is combined, just long enough to make the mixture crumbly without melting the butter.
    • Sprinkle crumb topping over apples. Since the apples will be stacked so high, you will have to place and guide the crumb topping with both hands so it stays on the apples and not your work surface.
    • Place pie in oven, with rack on bottom 1/3 of oven. Lay a piece of foil over the top of the pie, and place a cookie sheet or large piece of foil below the pie (the way you know it’s done is when the juices start to boil over).
    • Bake 50 minutes and then remove foil from top of pie.
    • Bake 10 more minutes, or until the juices start to bubble and boil over.
    • Best served warm with vanilla bean ice cream.

    Read Full Post »

    The stuff in the back is the peppers and eggplant (no sausage, since I made it as a side dish for the meatloaf)

    The stuff in the back is the peppers and eggplant (no sausage, since I made it as a side dish for the meatloaf)

    This is a delicious versatile side dish without the sausage, or a delicious main dish with the sausage.

    Peppers & Eggplant (& Sausage)

    OPTIONAL: 1 lb spicy Italian sausage, cut in chunks, browned in a large heavy bottomed pan, and then the fat poured off

    2 – 4 Tbsp extra virgin olive oil

    1 onion, sliced

    1/2 tsp salt

    6 cloves garlic, minced

    2 – 4 Japanese eggplants, quartered lengthwise, and then chopped

    3 bell peppers, chopped (yellow, red, and/or orange)

    2 Tbsp fresh parsley, chopped

    1 tsp fresh ground black pepper

    red pepper flakes, to taste

    • OPTIONAL: Cut sausage into chunks, brown in a heavy bottomed pot, remove from pot, and then pour off the oil. (Another option is to leave the sausage juice in the pan and use that to brown the onions. This is a delicious option, but some people just don’t like sausage juice.)
    • Place olive oil in pan, heat over medium high heat, and then add onions and salt.
    • Stir onions occasionally until they get wilty, then add garlic.
    • Continue to stir occasionally as onions and garlic caramelize.
    • Add eggplant and peppers, stir, and cover mixture.
    • Let the nightshades cook for about 10 minutes or so, stirring occasionally.
    • Add the parsley, pepper, red pepper flakes, and sausage, and cook uncovered for about another 10 minutes, stirring frequently.
    • When the nightshades have reached the desired tenderness, serve with some nice crusty french bread, or over polenta.

    Read Full Post »

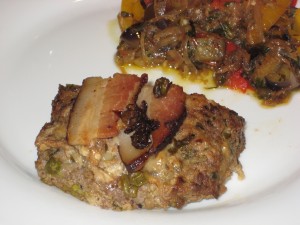
    This is obviously a picture of some leftover meatloaf, since it was so delicious I forgot to photograph it the first time around.

    This is obviously a picture of some leftover meatloaf, since it was so delicious I forgot to photograph it the first time around.

    We went in on a 1/4 of a cow (we’ll call her Bessie) with some relatives. A good portion of my freezer is now occupied by beef. Meatloaf made of high quality grass fed beef from a cow you’ve named is NOT to be missed! Delicious, delicious, delicious. In fact, this meatloaf turned out so delicious that I forgot to photograph it when it was in loaf form, and only remembered a few days later when it had become delicious leftovers.

    1. Prepare the Pan

    1 tsp olive oil (yes, just a tiny bit to coat the onions, since you’re going to top the meatloaf with bacon)

    1 onion, sliced

    2 cloves garlic, chopped

    sprinkle of salt

    • Heat oven to 400.
    • Pour olive oil into pan, heat over medium high heat, and add onions and salt.
    • When onions are wilty, add garlic.
    • Continue to cook, stirring occasionally, as you mix and form the meatloaf.

    2. Prepare Meatloaf

    2 lb ground beef

    1 cup high quality stale bread, cubed

    1/4 cup asiago, cubed

    1/4 cup fontina, cubed

    1/4 cup grated parmesan/romano blend

    1/8 cup chopped parsley

    1 tsp freshly ground black pepper

    1 tsp salt

    red pepper flakes to taste

    3 eggs

    • Place all ingredients in a large bowl, and mix with hands.
    • Be very careful not to over mix, as this will make the meatloaf tough and bouncy. Only mix long enough to evenly distribute all of the ingredients, and only mix with your hands. Never use a mixer, or you will end up with a football on you hands, and not a meatloaf.
    • Form into a meatloaf shape.

    3. Bake Meatloaf

    Heavy bottomed pan with sauteed onions and garlic

    Meatloaf

    1/3 – 1/2 lb bacon (that Applewood smoked uncured stuff from TJ’s is REALLY good!)

    2 packages frozen peas

    • Add peas to pot with onions, and mix.
    • Clear a space in the center of the pot for the meatloaf.
    • Arrange bacon strips on top of the meatloaf.
    • Cover, and bake for about 20 minutes.
    • Remove lid, and bake until meat thermometer reaches desired rareness temperature (about 30 more minutes, depending on the shape of the loaf).
    • If the onions start to stick to the pot, add a little water or broth. This will also make a really nice sauce.

    Read Full Post »

    What’s a girl to do when she’s up to her ears in Japanese eggplants and cherry tomatoes from the garden? Make a delicious pasta dish! (Pictures on their way – camera forgotten at someone’s house, which is a real shame since this is a nice colorful dish.)

    Summer Eggplant Pasta

    4 Japanese eggplants, quartered lengthwise and then cut into chunks

    4 cups multi colored cherry tomatoes, halved

    6 cloves garlic, chopped

    4 Tbsp olive oil

    2 Tbsp fresh basil leaves, thinly sliced

    Red pepper flakes to taste

    1/2 tsp salt

    1/2 tsp fresh ground black pepper

    1/2 lb pasta (penne, farfalle, or fusili work best)

    1 cup fresh mozzarella, cut into 1/2-inch cubes

    Freshly grated parmesan

    • Place olive oil in heavy bottomed sauce pan and heat over medium to medium high heat.
    • Add garlic and eggplants and stir frequently as they brown.
    • Add cherry tomatoes, basil, and spices and cook just until warm (do not overcook).
    • Cook and drain pasta, and then stir a little bit of sauce into the pasta so it doesn’t stick.
    • Scoop servings of pasta into bowls, sprinkle some cubed mozzarella onto the pasta, and top with the sauce.
    • Sprinkle parmesan on top.
    • Toasted pine nuts would also be good sprinkled on this pasta.

    Read Full Post »

    I think Meliza originally found this recipe in O magazine. It’s delicious! When I made it, we had a whole bunch of smoked salmon that we had made and screwed up because we followed a recipe for a brine that made the salmon taste more like a salt lick than the delicious smoked salmon we like to make and snack on. Since this was specifically for salads involving that salty salmon, I omitted the salt. This made for some very delicious salads. Another delicious salad addition when using this dressing is fresh corn, sliced off the cob and thrown into your salad bowl.

    Ranch Dressing

    1 clove garlic, very finely minced

    1 Tbsp fresh dill, finely chopped

    1 Tbsp fresh parsley, finely chopped

    2 scallions, finely chopped

    1 Tbsp chives, finely chopped

    1/2 cup buttermilk

    1/3 cup sour cream

    1 tsp salt

    1/2 tsp fresh ground black pepper

    • Place all ingredients in a jar or sealable container that is good for pouring.
    • Shake well.
    • Pour over salad.

    Read Full Post »

    This post has been on hold since July when things got hectic because that guy Dan proposed to me and then we launched straight into wedding planning. Fortunately, September is a good month for barbecues, and this potato salad is fantastic for barbecues! (Picture will be added later – I forgot my camera at someone’s house last weekend, and that’s where the pictures are.)

    ===================

    My grandma made the best potato salad, but I can never leave well enough alone so I added a few things. I believe I have maintained the integrity of the dish, however, with the perfectly balanced flavors and textures of big chunks of red potato and hard boiled eggs, and a nice creamy sauce. We had this with Dan’s smoked ribs and our home made barbecue sauce and, let me tell you, THAT was a match made in heaven!

    Grandma’s Potato Salad, with a Twist

    1. Boil the potatoes, and then dress them while they’re hot. Here’s what you’ll need:

    2.5 lbs red potatoes (as fresh as possible so the skin is still tender), scrubbed, bad spots cut off, and cut in 1-inch cubes (do not peel)

    Large 8 – 10 quart stock pot

    Enough water to cover the potatoes, plus about 2 inches more

    1/8 cup salt (for boiling the potatoes)

    1/4 cup cider vinegar (to dress the potatoes after they’ve boiled, but while they’re still hot)

    1/8 cup olive oil (to dress the potatoes after they’ve boiled, but while they’re still hot)

    • Pour a few cups of water into the stock pot to throw the potatoes into as you chop them. My mom told me this prevents them from getting gray. I never questioned it; I just do it and the potatoes never get gray, so do with this information what you will, as I cannot explain the chemistry behind it and have never not done it.
    • When you have cut all of the potatoes and they are in the stock pot, make sure you have covered them with water, plus about 2 more inches above that level.
    • Use a larger stock pot than you need in order to prevent a big foamy mess on your stove. You should have at least 4 inches of clearance between the top of the water, and the lid.
    • Add salt.
    • Cover pot, and place over high heat.
    • Keep a close eye on the pot, as potatoes always look sweet and innocent, and then they suddenly boil over.
    • If you’re bored, hard boil your eggs and start chopping scallions as you wait.
    • As soon as the potatoes feel a bit tender (but just before you think they’re perfectly done), pour them into a large colander. They will continue to cook after you drain them, which is why you want to drain them before they taste perfectly done.
    • Transfer potatoes back into the pot, and pour the cider vinegar and olive oil over them.
    • Place in fridge to chill and marinate overnight.

    2. Hard boil the eggs. Here’s what you’ll need for that:

    10 chicken eggs (preferably brown, cage free, hormone free, antibiotic free, made by happy chickens)

    2 -3 qt sauce pan

    Enough cold water to cover the eggs

    • Carefully place eggs in pot, and cover with tap water.
    • Place pot on stove, and heat over medium to medium-high heat to rolling boil.
    • Boil for 10 minutes, then remove from heat, pour off water, and run cold water over the eggs.
    • Crack and peel eggs while warm (it seems to be easier when they’re warm, and then they’re easier to store in the fridge overnight when they’re out of their shells).
    • Store in fridge overnight.

    3. Make the Dressing

    1/2 cup sour cream

    1/4 cup mayonnaise (I like the Trader Joe’s organic kind)

    1 – 2 Tbsp crumbled Roquefort (optional)

    Fresh dill to taste, coarsely chopped (optional)

    Fresh ground black pepper to taste

    • Place mayo, sour cream, and Roquefort in a small bowl and mix until smooth.
    • Add dill and pepper in bowl and mix.

    4. Assemble the Best Potato Salad Ever:

    Chilled potatoes (from step 1)

    Chilled eggs (from step 2)

    1 bunch of scallions, chopped

    Dressing (from step 3)

    • Place chilled potatoes and eggs in a large bowl.
    • Chop scallions and add to potato/egg bowl.
    • Pour dressing over potatoes, eggs, and scallions.
    • Stir with a large spoon to distribute dressing.
    • Snack on some while you’re nice and hungry.

    Read Full Post »